For Developers
This page contains tips and tricks for developers, further resources, along with information on how to set up your build environment on your platform.
Before building Nimbus for the first time, make sure to install the prerequisites.
Helpful resources
Nim programming language
Nimbus is built in the Nim language. The compiler is automatically installed when building the project for the first time.
Code style
The code follows the Status Nim Style Guide.
Branch lifecycle
The git repository has 3 main branches, stable, testing and unstable as well as feature and bugfix branches.
Unstable
The unstable branch contains features and bugfixes that are actively being tested and worked on.
- Features and bugfixes are generally pushed to individual branches, each with their own pull request against the
unstablebranch. - Once the branch has been reviewed and passed CI, the developer or reviewer merges the branch to
unstable. - The
unstablebranch is regularly deployed to the Nimbus Hoodi fleet where additional testing happens.
Testing
The testing branch contains features and bugfixes that have gone through CI and initial testing on the unstable branch and are ready to be included in the next release.
- After testing a bugfix or feature on
unstable, the features and fixes that are planned for the next release get merged to thetestingbranch either by the release manager or team members. - The
testingbranch is regularly deployed to the Nimbus Hoodi fleet as well as a smaller mainnet fleet. - The branch should remain release-ready at most times.
Stable
The stable branch tracks the latest released version of Nimbus and is suitable for mainnet staking.
Build system
Windows
You can now follow the instructions in this this book by replacing make with mingw32-make (you should run mingw32 regardless of whether you're running 32-bit or 64-bit architecture):
Linux, macOS
After cloning the repo:
# Build nimbus_beacon_node and all the tools, using 4 parallel Make jobs
make -j4

# Run tests
make test

# Update to latest version
git pull
make update
Environment
Nimbus comes with a build environment similar to Python venv. This helps ensure that the correct version of Nim is used and that all dependencies can be found.
./env.sh bash # start a new interactive shell with the right env vars set
which nim
nim --version # Nimbus is tested and supported on 1.2.12 at the moment

# or without starting a new interactive shell:
./env.sh which nim
./env.sh nim --version

# Start Visual Studio code with environment
./env.sh code
Makefile tips and tricks for developers
-
build all those tools known to the Makefile:
-
build a specific tool:
-
you can control the Makefile's verbosity with the V variable (defaults to 0):
-
same for the Chronicles log level:
-
pass arbitrary parameters to the Nim compiler:
-
you can freely combine those variables on the
makecommand line: -
don't use the lightweight stack tracing implementation from nim-libbacktrace:
-
disable
-march=nativebecause you want to run the binary on a different machine than the one you're building it on: -
disable link-time optimization (LTO):
-
show C compiler warnings:
-
limit stack usage to 1 MiB per C function (static analysis - see the GCC docs; if LTO is enabled, it works without
-d:cwarnings): -
build a static binary:
-
publish a book using mdBook from sources in "docs/" to GitHub pages:
-
create a binary distribution:
Stress-testing the client by limiting the CPU power
The limiting is provided by the cpulimit utility, available on Linux and macOS.
The specified value is a percentage of a single CPU core.
Usually 1 - 100, but can be higher on multi-core CPUs.
Build and run the local beacon chain simulation
The beacon chain simulation runs several beacon nodes on the local machine, attaches several local validators to each, and builds a beacon chain between them.
To run the simulation:
To clean the previous run's data:
To change the number of validators and nodes:
# Clear data files from your last run and start the simulation with a new genesis block:
make VALIDATORS=192 NODES=6 USER_NODES=1 local-testnet-minimal
If you’d like to see the nodes running on separated sub-terminals inside one big window, install Multitail (if you're on a Mac, follow the instructions here), then:
You’ll get something like this (click for full size):
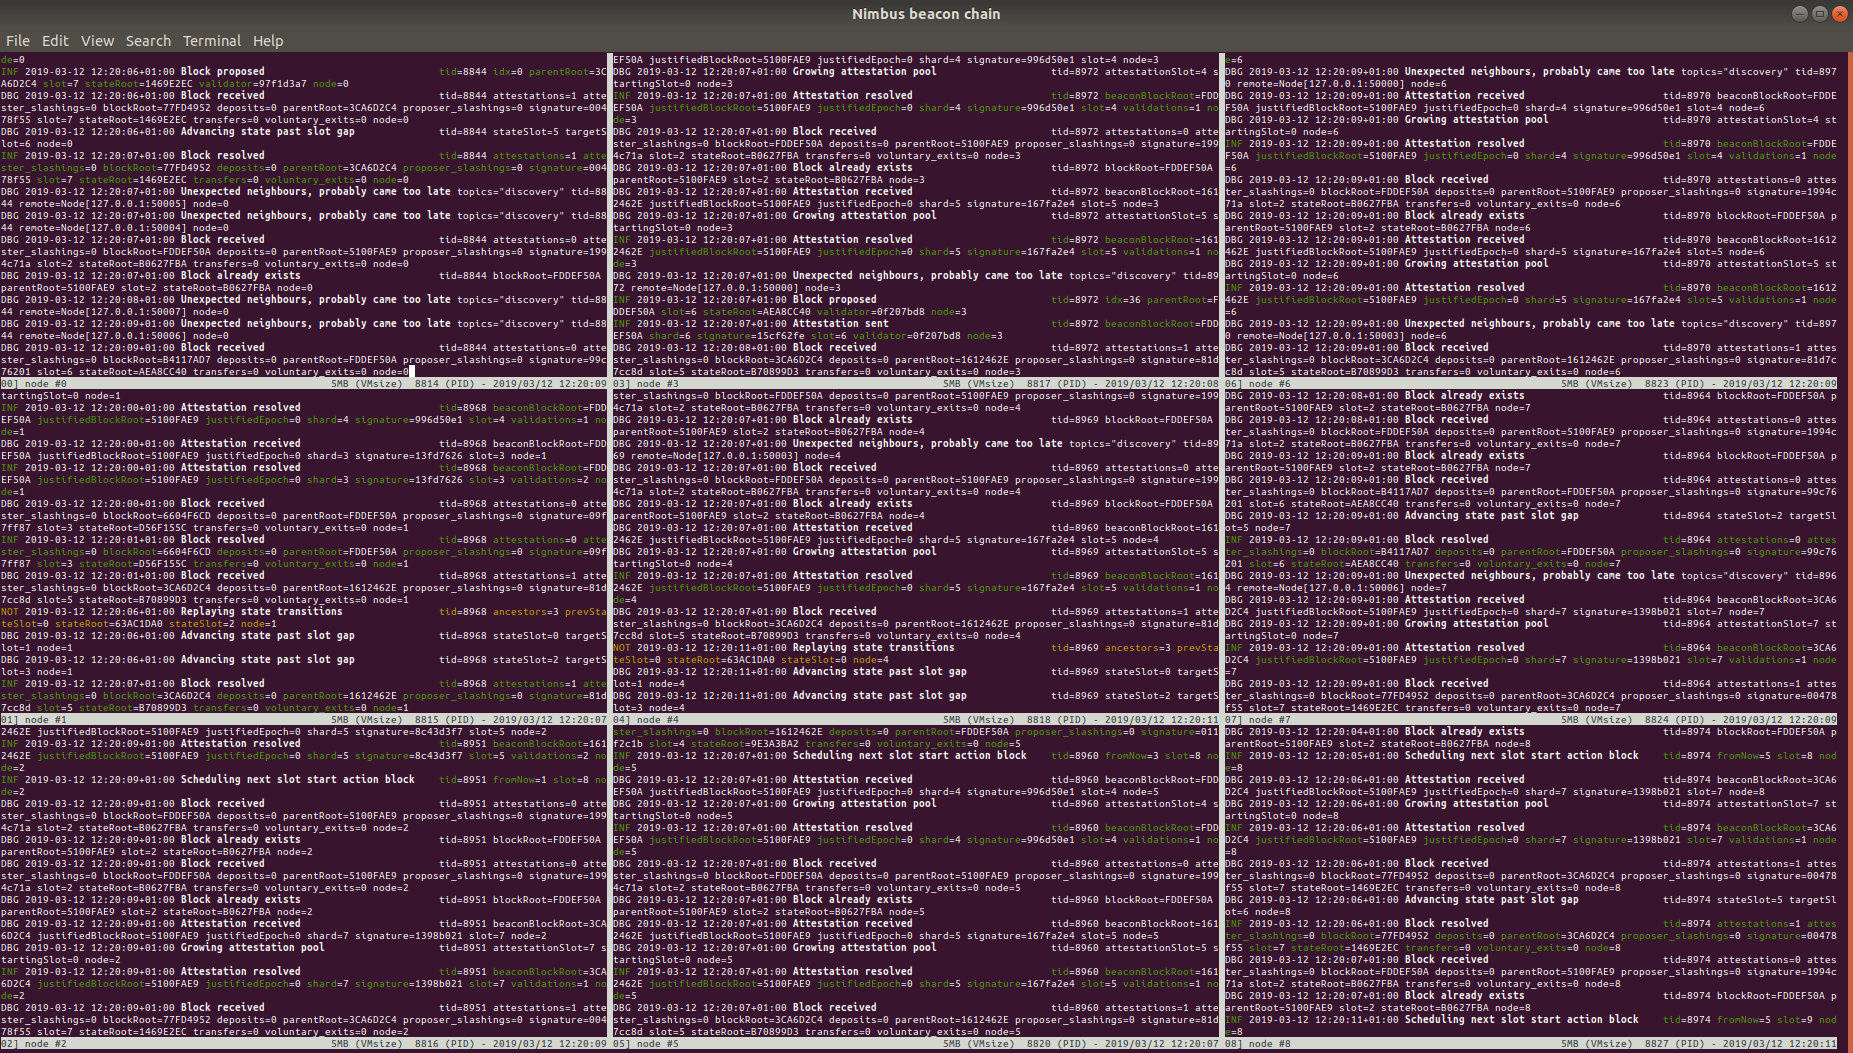
You can find out more about the beacon node simulation here.
Build and run the local state transition simulation
This simulation is primarily designed for researchers, but we'll cover it briefly here in case you're curious :)
The state transition simulation quickly runs the beacon chain state transition function in isolation and outputs JSON snapshots of the state (directly to the nimbus-eth2 directory).
It runs without networking and blocks are processed without slot time delays.
# build the state simulator, then display its help ("-d:release" speeds it
# up substantially, allowing the simulation of longer runs in reasonable time)
make NIMFLAGS="-d:release" block_sim
build/block_sim --help
Use the output of the help command to pass desired values to the simulator.
Experiment with changing the number of slots, validators, etc. to get different results.
The most important options are:
slots: the number of slots to run the simulation for (default 192)validators: the number of validators (default 6400)attesterRatio: the expected fraction of attesters that actually do their work for every slot (default 0.73)
For example, to run the block simulator for 384 slots, with 20,000 validators, and an average of 66% of attesters doing their work every slot, run: